Connecting Dynamics 365 Business Central with Dataverse using virtual tables streamlines CRUD operations without data replication. This guide outlines the process to establish this connection.
To use this feature, multiple things are needed to be done for this connection to be done. You will need to follow these steps to achieve that connection.
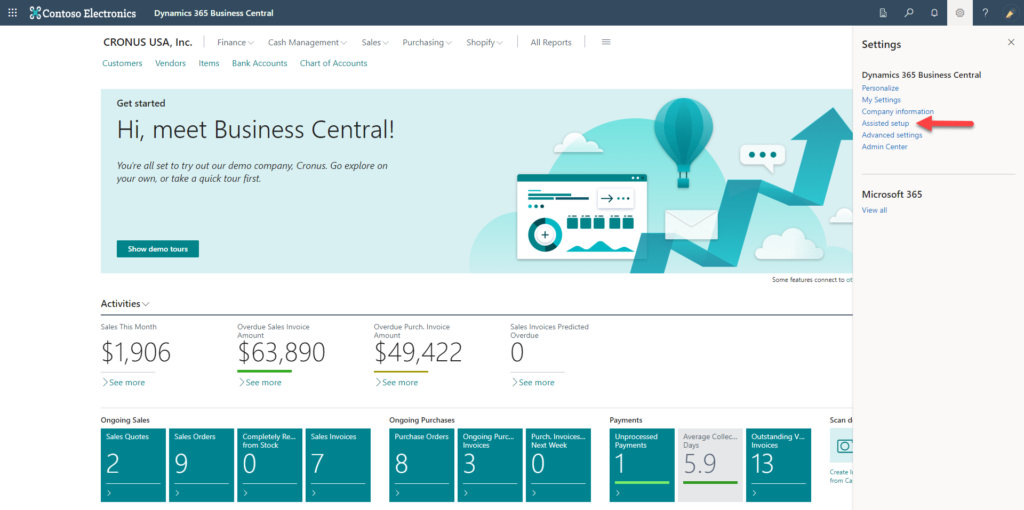
1. In the first step, you need to log into your Business Central environment and click on the gear “Settings” icon in the top right corner. After that click on “Assisted setup”.
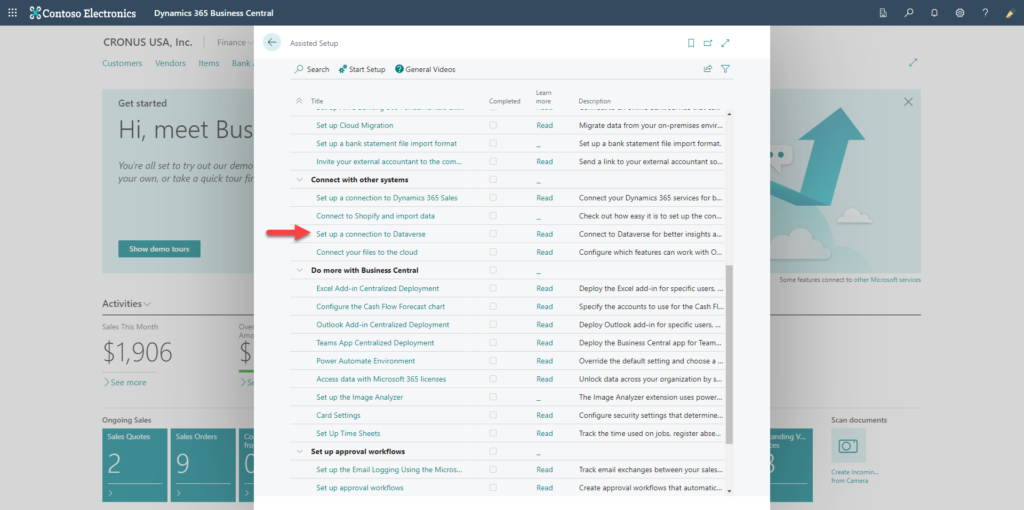
2. On the Assisted Setup screen, you will need to find the “Setup connection to Dataverse” option and click on it.
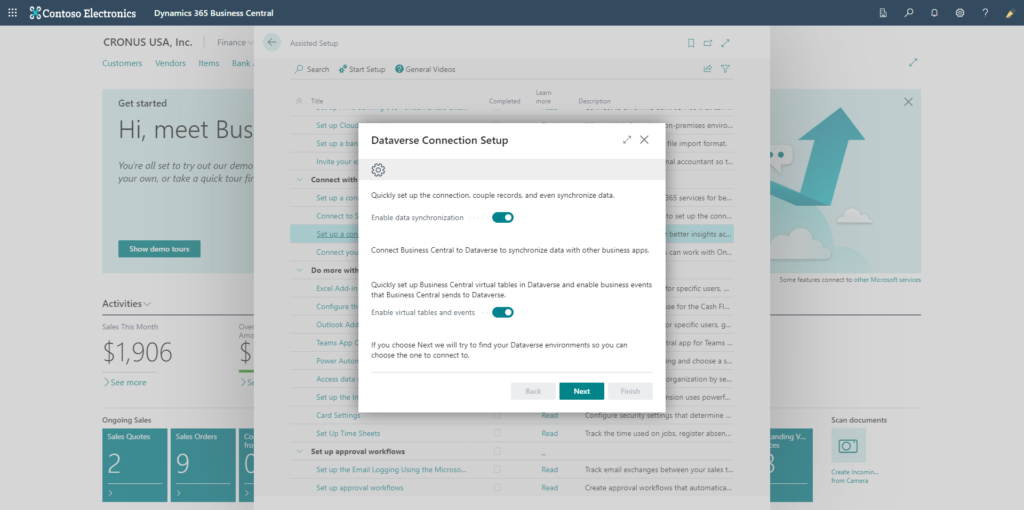
3. The first thing to set is a Dataverse connection to “Enable data synchronization” and to “Enable virtual tables and events”. Enable these two settings and click on “Next”.
4. On this screen, please read the terms and conditions, and after that click on “I accept” to be able to proceed with this connection setup.

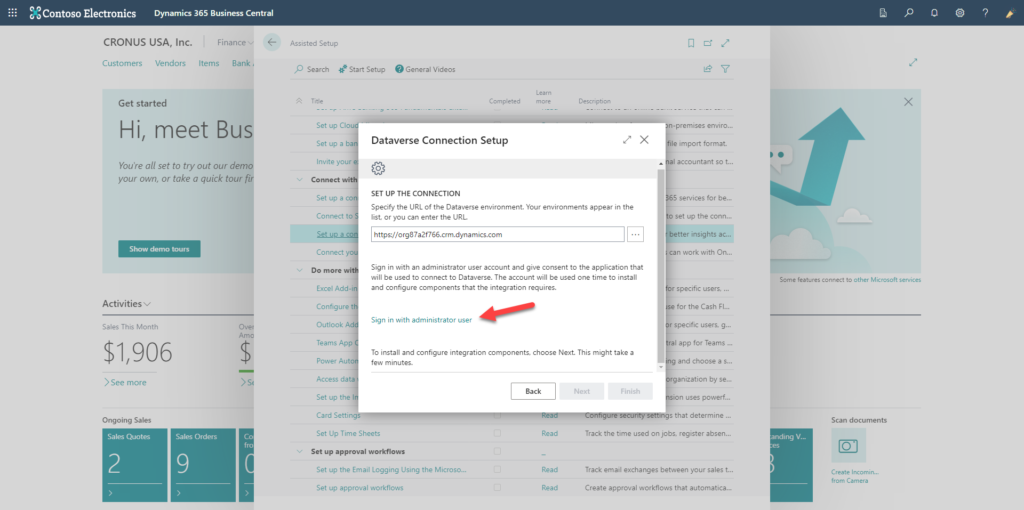
5. The next screen is where you need to specify your URL to the Dataverse environment. After you have done that click on “Sign in with administrator user” which will open the prompt for the sign-in.
6. After that is done you will see the message “The administrator is signed in” and you can click on the “Next” button.

7. This procedure will take some time, so just wait for this screen to finish.

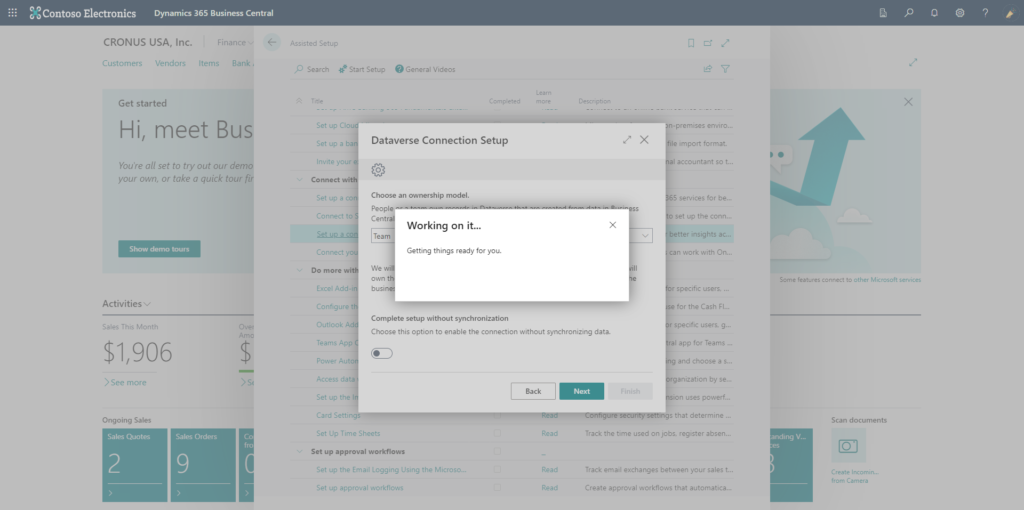
8. The next thing to do is to choose an ownership model that will own records in Dataverse. It is recommended to select the “Team” model. This will automatically create a new business unit and team in Dataverse for you. Also, you have the option here to choose if you want to synchronize data or not data now. Based on your preference you can check or uncheck this toggle. After that click on the “Next” button.

9. This procedure will take some time, so just wait for this screen to finish.
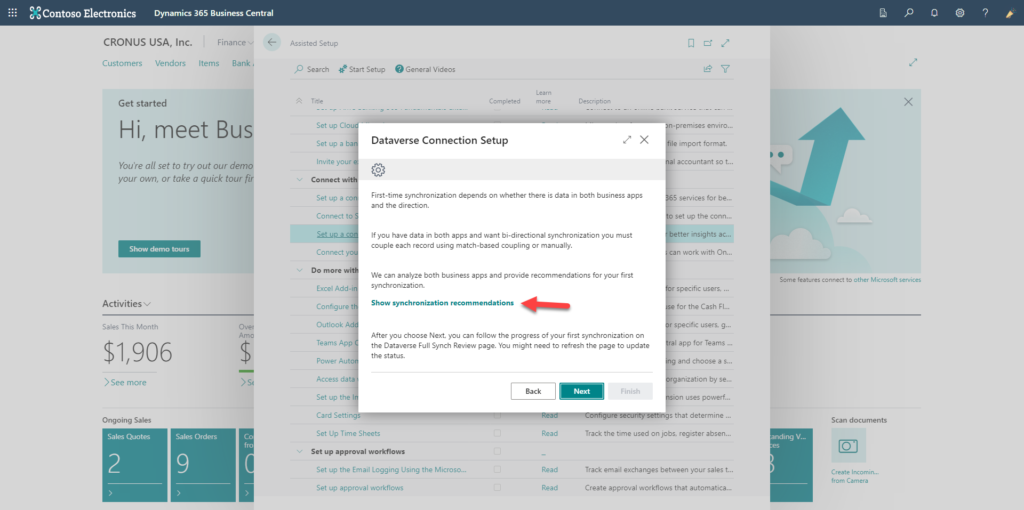
10. When the previous step is finished, the next thing is to choose rules for bi-directional synchronization on the “Show synchronization recommendations” button.
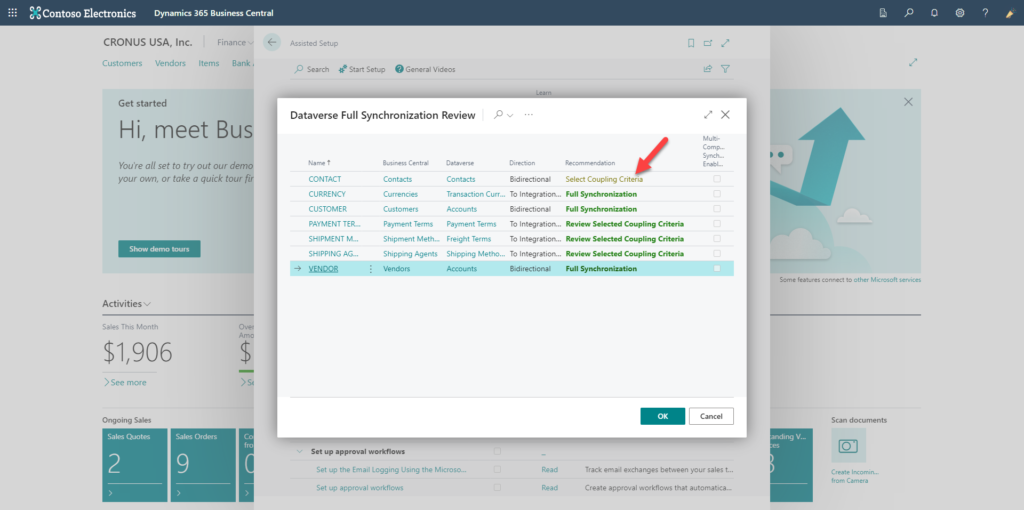
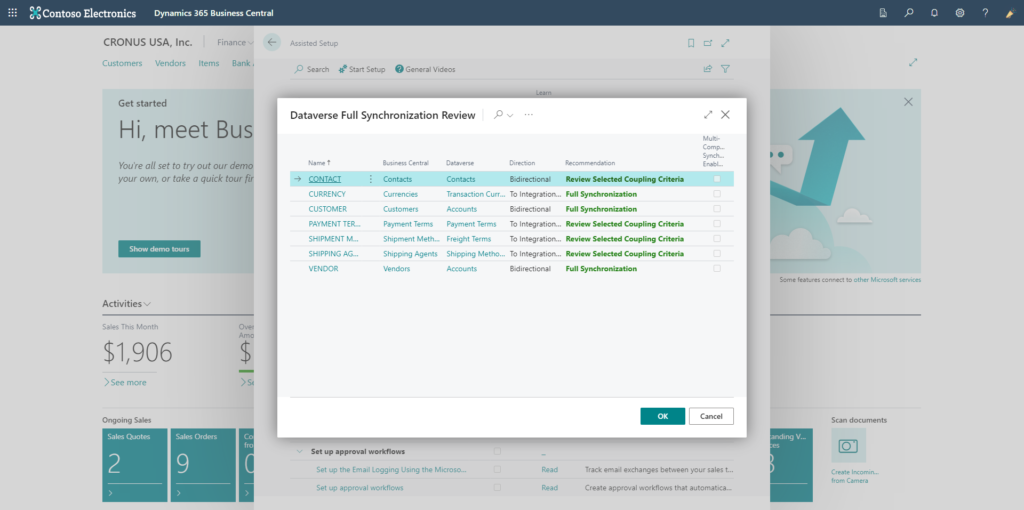
11. On the next screen, you will set up a Dataverse Full Synchronization Review where you need to set up all rules for synchronization between Business Central and Dataverse based on your tables. You can see on my screen that I only have one table to set with Coupling Criteria, and that is because I am working with a fresh demo environment. If you have more things to set up, please go through all of them so they can be properly set up.
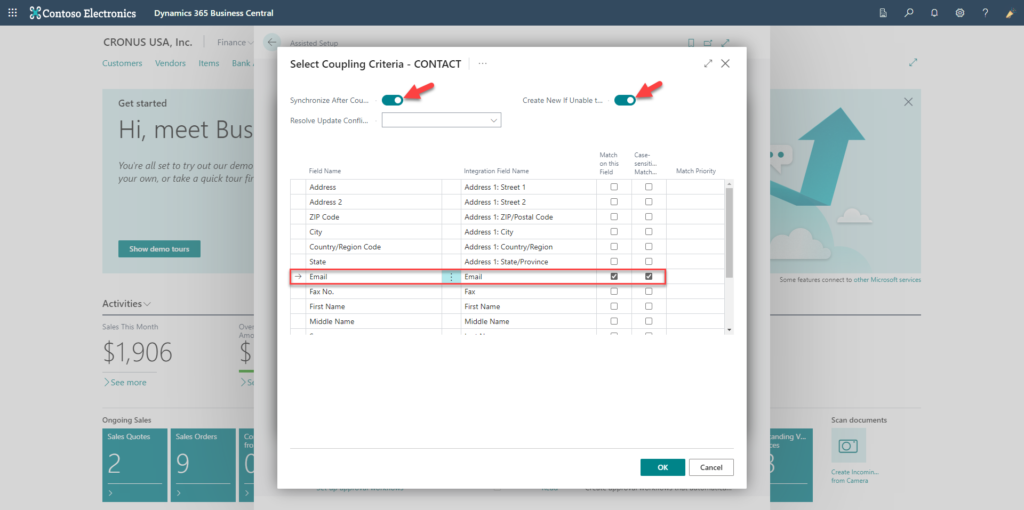
12. When I get to the Contact selecting Coupling criteria screen, I choose rules to be set on the Email field by selecting two checkboxes: “Match on this Field” and “Case sensitive Match”. After that, I checked two more buttons at the top: “Synchronize After Coupling” and “Create New If Unable to Process” and then clicked on the “OK” button to complete the setup for the CONTACT table.
13. After you check all your tables and finish with the changes, your screen should look something like this with all synchronizations in green color. Click on the “OK” button to proceed.
14. After you finish selecting all fields for your bi-directional connection, you will be redirected again to the same screen as before, and here if you are finished with the coupling process, just click on the “Next” button.

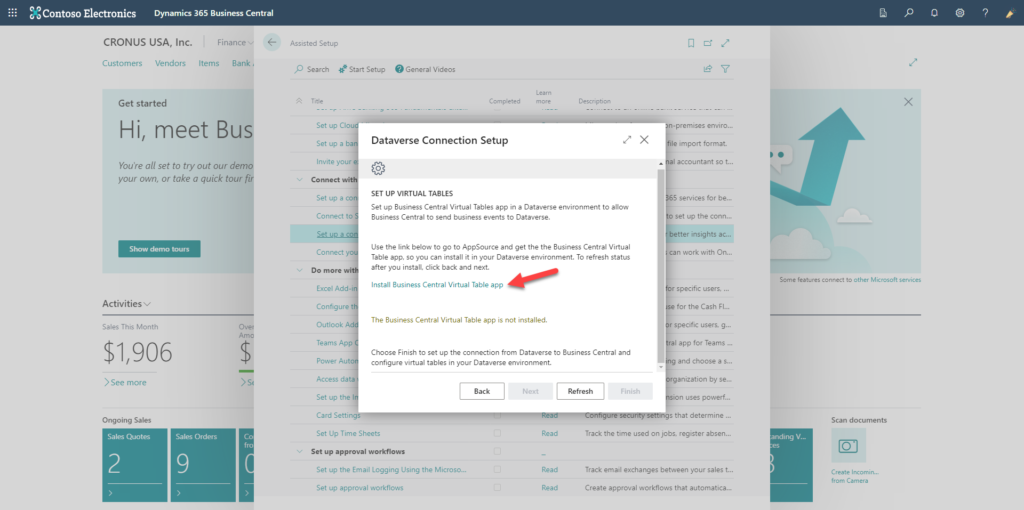
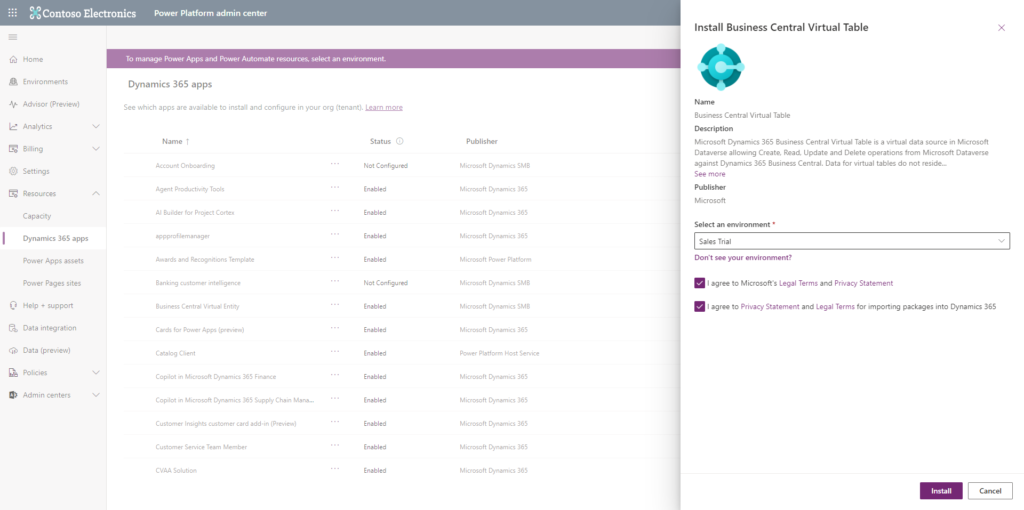
15. The next thing for this setup is to install the Business Central Virtual Table app, which is mandatory for this connection to be established. The application is free and can be downloaded from the Microsoft AppSource store. All you need to do is click on the button “Install Business Central Virtual Table app” and it will redirect you directly to the store.
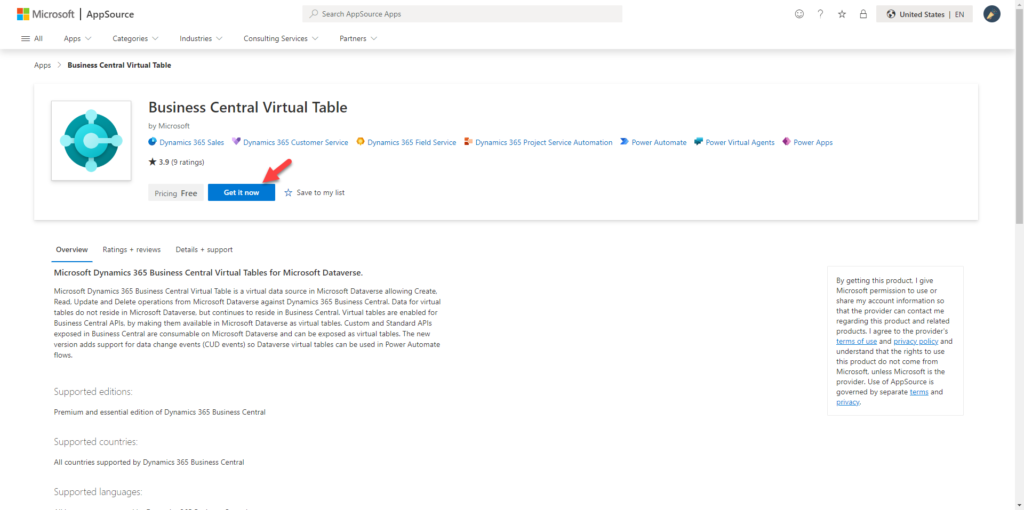
16. On the store page, all you need to do is click on the button “Get it now” and the process of the installation will start, and you will be redirected to the Power Platform admin center.
17. Now that you are on the Power Platform admin center page, you will see the prompt to select the Dataverse environment to which you would like to connect your Business Central data. After that, you need to agree to the Legal Terms and Privacy statement by checking two checkboxes. Please read everything before you agree to know all the stuff that you agree on. After you agree, you can click on the “Install” button.
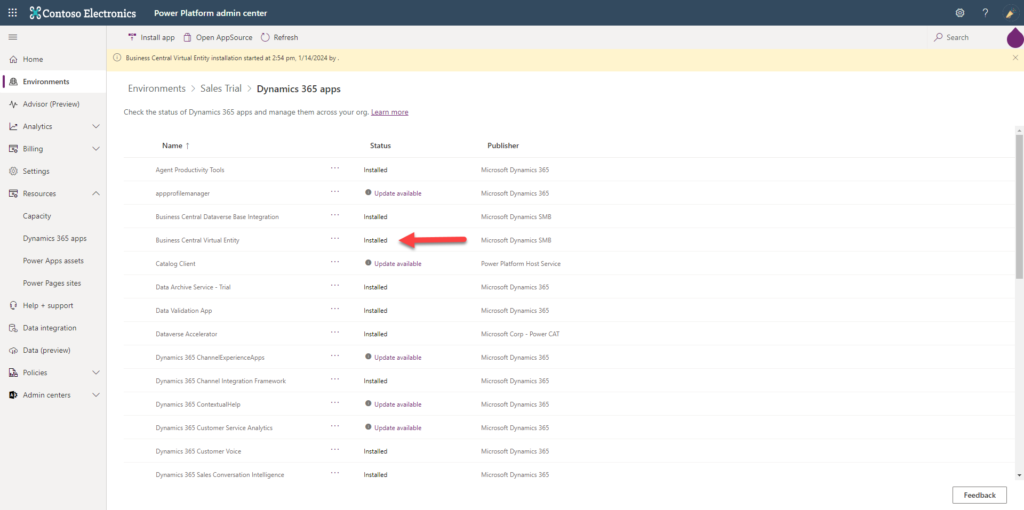
18. After that installation of the Business Central Virtual Entity application will start and you will see on the screen the process.

19. After some time, the installation will finish, but to see the result you will need to refresh the page manually. When the application finishes you will see the Status “Installed”.
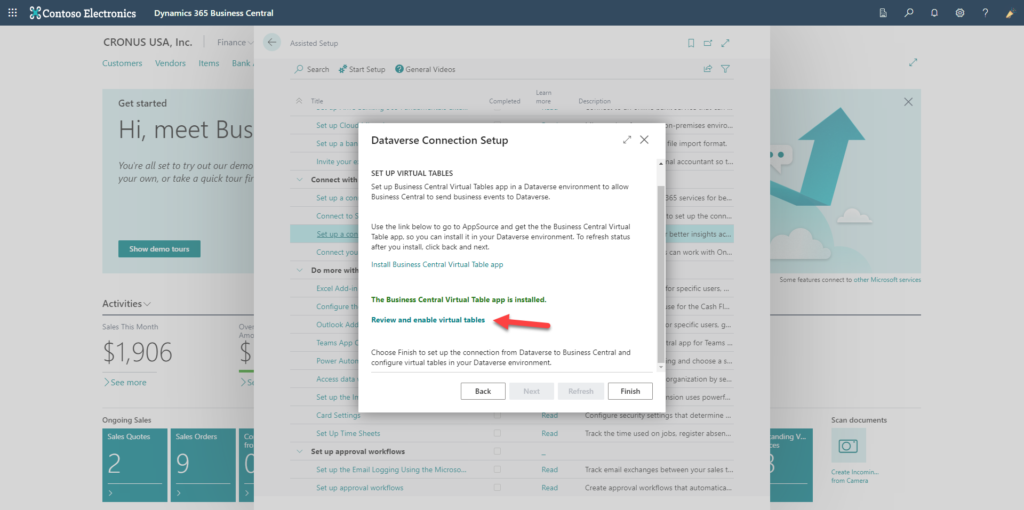
20. When you complete the installation, you need to go back to the Business Central page and click on the “Refresh” button so that Business Central checks if you now have installed the application correctly.

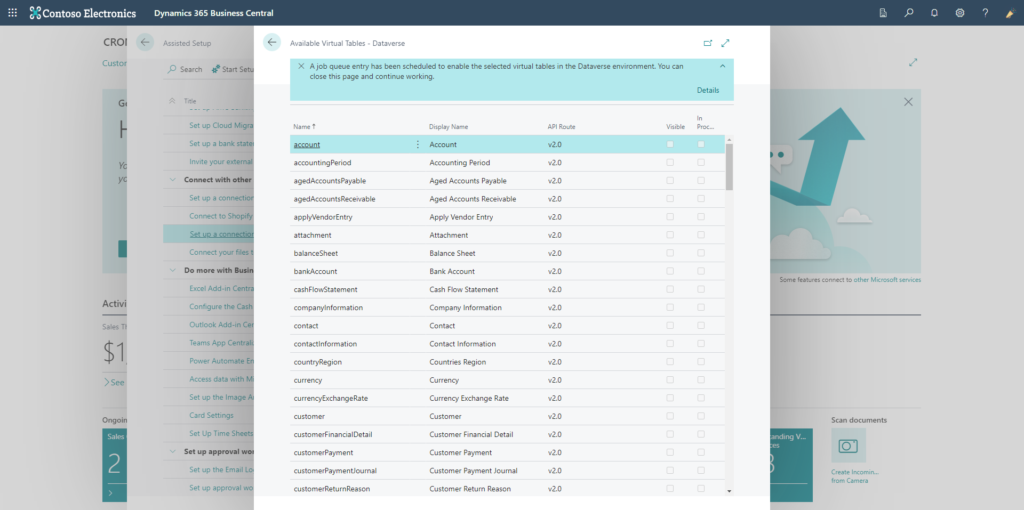
21. If everything is correct, you will see the green message that says, “The Business Central Virtual Table app is installed”. After that, you need to click on “Review and enable virtual tables”.
22. Now the screen with the list of all available virtual tables is displayed and you need to choose which ones you would like to be visible in Dataverse from Business Central. In my example, I chose the “Employee” table and clicked on the “Enable” button in the top bar of the screen.
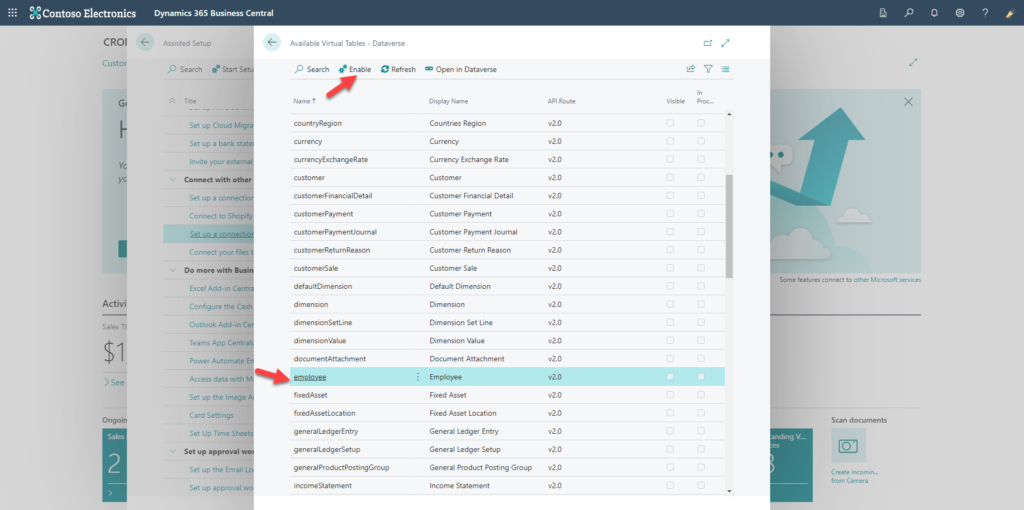
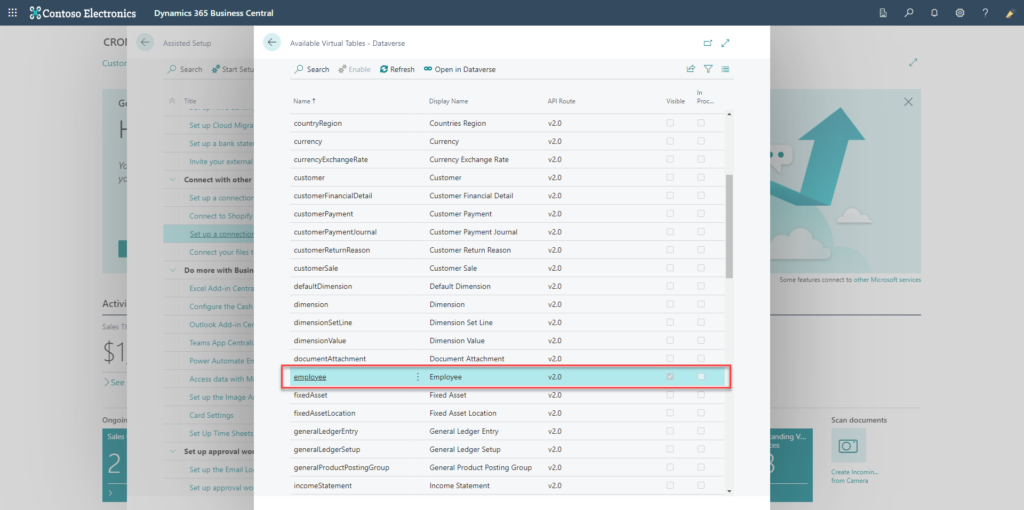
23. When you click that the informational message will be displayed for you to know that the job has started. This will take some time, so be patient with this.
24. After the job finishes you will see that the box in the Visible column is checked, and you are now able to see this in the Dataverse.
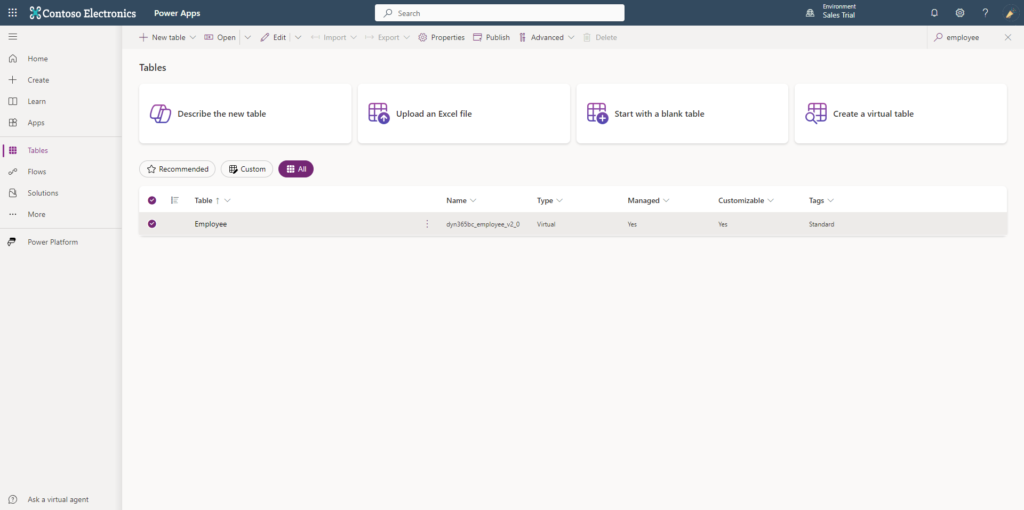
25. You can go to the Power Apps Tables page and search for your new Table created by Business Central.
This guide simplifies connecting Dynamics 365 Business Central and Dataverse using virtual tables, enhancing your data management capabilities.
I hope you liked this blog post. Please leave a comment if you have any feedback or questions.
Leave a Reply