How many times have you missed that your flow has failed for any reason?
This blog shows and explains how to overcome all missed flow runs that have failed for many different reasons.
How to solve this issue:
Creating additional steps inside of the Power Automate to notify you via email when a flow fails involves setting up error handling and sending an email action.
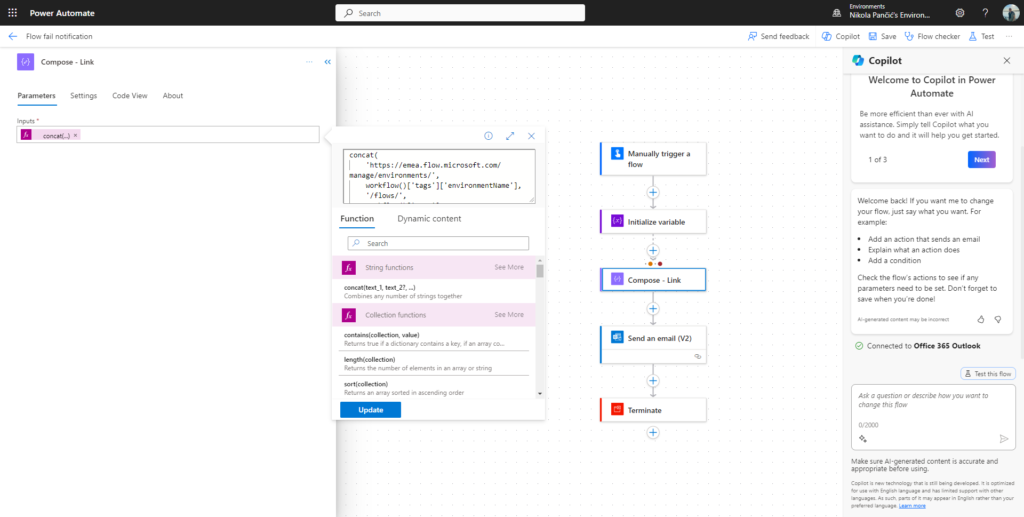
1. Add Compose Link
The first step is to create a link that will dynamically be created for every flow run so that you can easily reference failed flow from your place where you will receive notification.
Code:
concat(
    'https://emea.flow.microsoft.com/manage/environments/',
    workflow()['tags']['environmentName'],
    '/flows/',
    workflow()['name'],
    '/runs/',
    workflow()['run']['name']
)

2. Add Error Handling
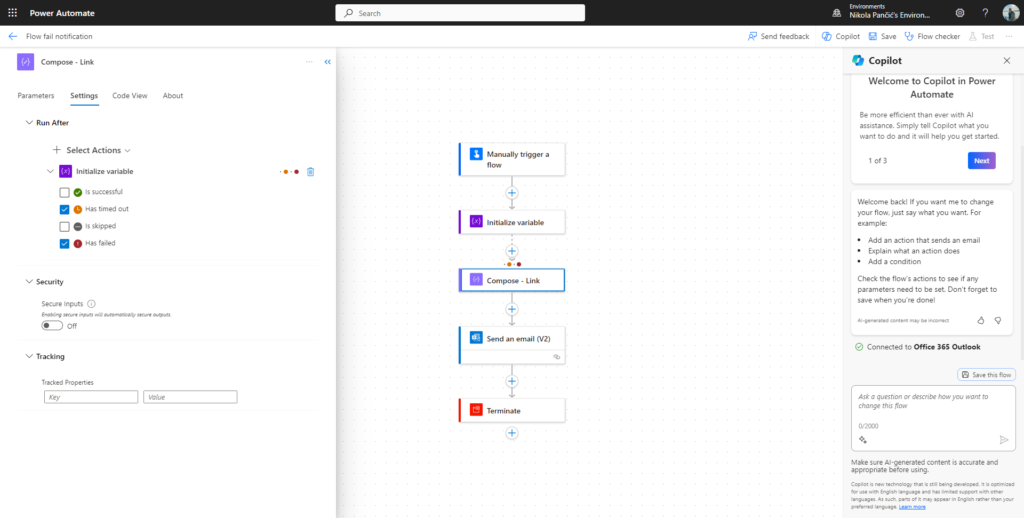
To set up error handling, change the “Run After” settings for each action. Click on the “Compose” action and select the Settings tab, so that you can configure “Run After” settings. Click on the dropdown and select the previous step that you want to configure “Run After” settings. Uncheck the “Is Successful” option and select “Has timed out” and “Has failed”. Now you have chosen when this step will be triggered in the future runs.

3. Add Send Email Action
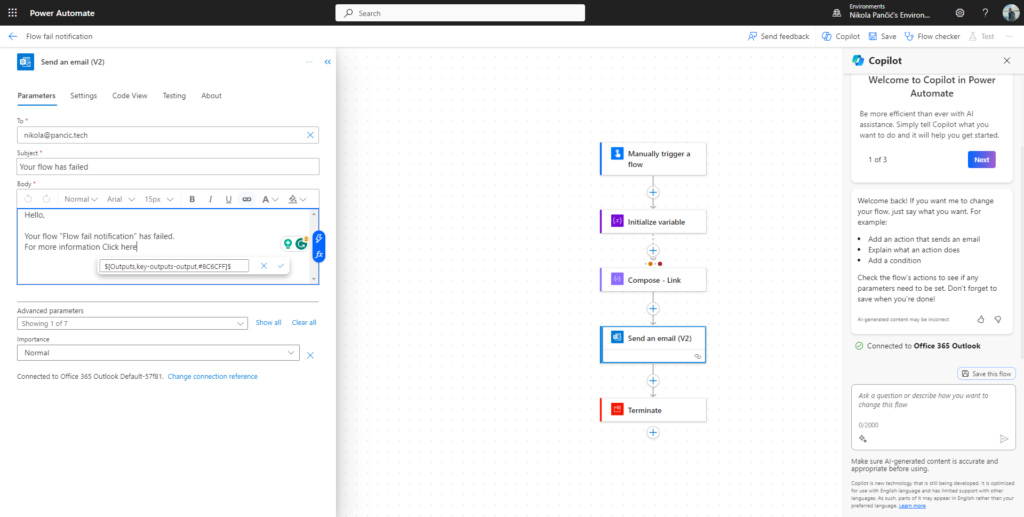
Add an action to send an email. Search for and select the “Send an email” action. Configure the email details like To, Subject, and Body. Add the output of your “Compose – Link” action into the body so that you can reference it automatically from your email when you get it.

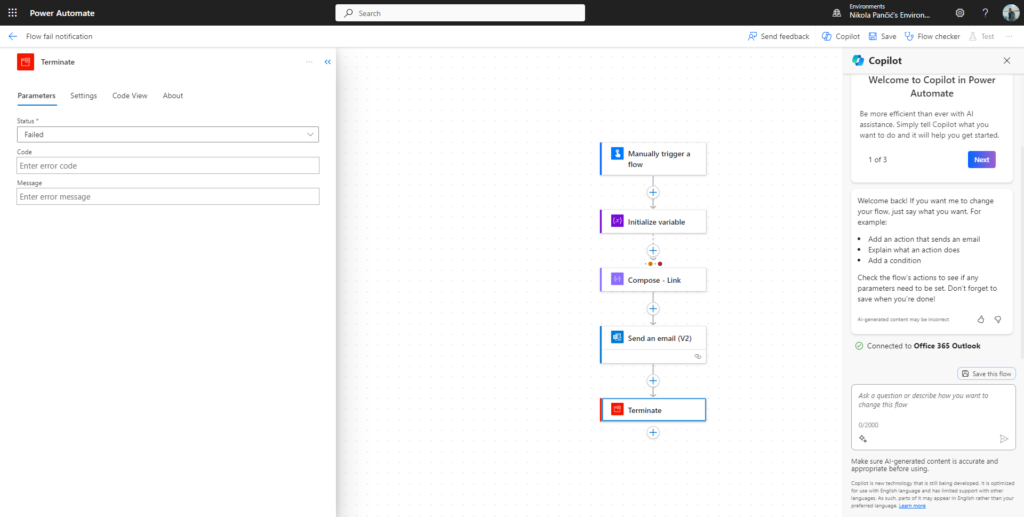
4. Add Terminate Action: Use the “Terminate” action after the error email/notification action and set the status field to “Failed”. This is a useful step to take because if you don’t set it your flow run when it fails will show that it “Succeeded” and you wouldn’t be able to know which one has failed.

5. Save and Test:
Save your flow and test it by intentionally causing a failure (for example, by inputting incorrect data).
Check your email to ensure that you receive a notification when the flow fails.
6. Configure Additional Notifications (Optional):
Depending on your needs, you may want to add additional notification actions, such as posting to Microsoft Teams, creating a log entry, or sending a notification to other channels.
Now after you take these steps you can implement them in every flow that you have created previously and will create in the future. You will never miss when your flow has failed and will be able to act quickly.
I hope that this blog will help you to get notified about every Power Automate flow action.
Stay tuned for more tips and blogs soon!

Leave a Reply